
 10-20 person workshop:
2-3 hour time frame
50-150 bags
Supply list:
2/3 grommet machines ( 3 Hikers or 2 Hikers and 1 Giraffe)
Grommets
Grommets
2/3 bag pushers
Drip tape
2/3 straight back chairs or add clamp bagshare "Tombstones" to a low table
1/2 tape dispensers with masking tape
Scissors
Water
Spray bottle
Cloth rag
Bowling ball/ 20 lb bag of rice
C Clamps, o ne per grommet machine
C Clamps, o ne per grommet machine
Baling Twine
Bagshare Marking gauge( Click here for how to make this)
Lots of brew bags with liners and without
Heavier weight seed and feed bags
Step one:
Step one: Empty out the excess feed into a box.,
(Good job for younger bag makers) 3-5 people. Best done outside if possible. Or use a vacuum.
Ongoing:
Drip Tape prep: 1-3 people depending on size of workshop (Good job for younger bags makers)
Mark a 15” length on a table with a piece off tape. This is an idea length for a shortish carrying handle. It is not for shoulder bag. In my humble opinion drip tape is not ideal for a shoulder bag in that it is very slippery. But it’s your bag you can decide on the length of the handle.


Spray with H20 and dry with a rag, fold into three 5" lengths (making a u-shape) and temporarily staple the folds, then pass on to the handle grommeters.
Step Two:

They form and tape the bottoms of the bags and pass them on to the grommeters.
Bag Markers: (optional) 2 people
If getting the handles in the right place is a challenge use our marking gauge to mark the inside of the bags.
Click here to learn how to make this:
Place over the edge and use a sharp to make a small mark.
Try to mark towards the bottom of the circle so the marks do not get too close to the top of the bag.
The mark should be 3/4”-1 “ down from the top edge.
Step Three:
Grommet team: 6 people for 3 machines
2 people per machine:
One loads the grommets/ one grommets
Grommet the bottom of the bags first before the handles.
Use the Giraffe for this if you have one. If you don’t see our video as to how to pinch grommet the bottom.

All machines should be C clamped to a table. The HIKERS should be all mounted on a board and the board should stick out from the table so it is easier to insert the bag when grommeting. The Giraffe should also be clamped with a sturdy C Clamp. It does not need to be extended out from the table.
***Any younger kids age 6 -12 should have adult supervision when using the grommet machine. It is not a toy. We have had a number of injuries with this age group where they let the handle fall on their finger. It is very painful. When not in use the handle should be in the DOWN position. When in use it should be fully UP.
Grommeting the handles: 2 people per grommet machine
This is a skilled job and usually requires people age 15 and up.
We usually line up the handles up by eye. If this is too challenging use our marking gauge and have someone mark the bags so the handle placement is uniform.
We grommet the handle on from the INSIDE of the bag. Grommet one side of the handle from the inside about 3/4” to 1 “ down from the top leaving a 1” tab of drip tape free at the end. Make sure to space your grommet in the center of the drip tape. You can lower the HIKER handle without pressing so you can space it without grommeting right away.
Grommet. Make sure the handle is 90 degrees. Don’t angle it even though it’s a bit tricky to keep it straight. You will get better at this!
Turn the handle to grommet the other side. Keep it in the same plane.
To grommet the second handle, match up the existing ones with the other side and proceed. Make sure they are the same length.
Step four:
Bag Inspectors: 2 people
One bowling ball or 20 lb bag of rice
Inspectors put the weight in the bag and pull up on the handle. Check the following:
Handles even in length
Bottom grommets show on both sides of fabric
Handles have grommets secured in the middle of the drip tape
Grommets are secured at least 3/4-1 inch down from the top edge ion the bag also leaving at least 1//2”
of drip tape on the bottom
Bag is folded tightly on the bottom/ No wrinkles.
Grommets do not turn
Are handles in the someplace, not twisted?
It is the inspectors job to return bags and make the bag makers aware of any mistakes. If the grommet turns the Hiker is set too loosely. Turn the adjustment screw in the correct direction on the bottom die to make the space between the dies smaller so the grommet is set more tightly.
EXTRA JOBS if you have a large group/ Ongoing

Braiders: any number of braiding enthusiasts. All ages. A great job for socializing.
We always have tons of baling twine. It’s plastic and never goes away so lets re use it!
It’s too thin for what call a TIE IN handle. Separate it into three or more strands depending on the type of braid.
Braid it and tape off the ends so it stays together. Have some oil the bags grommeted without handles and tie in the braided ones.
Bag Consolidators: 1 person
As your finished bags build up pack them 4 bags inside bag in bags of 5. This way you can count them easily and store them better. If space is an issue you can string them through their handles and hang them up as a big bundle.


Foldover technique/ For heavier weight bags such as birdseed or feed bags
The ones with the pretty pictures: Any # of people Age 14 and up can do this.
See our video for tips on how to make these bags. We do a 3-4 :” for from the top of the bag creasing well, not crumbling or rolling the bag down.
Spend the extra time especially with the first fold to do this well. The second ad third fold will be same width until the bag ids the size you want. Grommet the top grommets like described above.Open up the bag along the side and pinch grommet the bottom from the outside to square the bottom. See the video for a better description.
Images: Some of the bags have the prettiest part of the image on the top.
Take these apart at the bottom and see our video for how to process these.
Music!
You need a DJ!


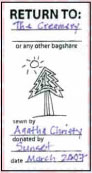 And ID tag is sewn on the front of each bag, designating it as a 'Use and Return' bag. The bags are borrowed when someone forgets their own bag and and returned to any BagShare location.